Managing pipelines#
Add applications and jobs to your pipeline, and add or modify stages.
A pipeline is created when you create a value stream. If, for example, you create a value stream named "My Value Stream," a corresponding "My Value Stream" pipeline is also created. On the Value stream detail page, click Pipeline to display the pipeline associated with the current value stream.
You can add environments, or stages, at any time and rearrange them as needed. Each application that you add to a pipeline is inserted onto a separate row below the last application. As you add apps and jobs to stages, tasks are added to the associated deployment plan in the order that they appear in the pipeline.
To modify a pipeline, complete the following steps:
-
On the Pipeline page, click Add Environment to create an environment, or stage.
-
In the Add environment window, and in the Environment name field, enter the environment name.
-
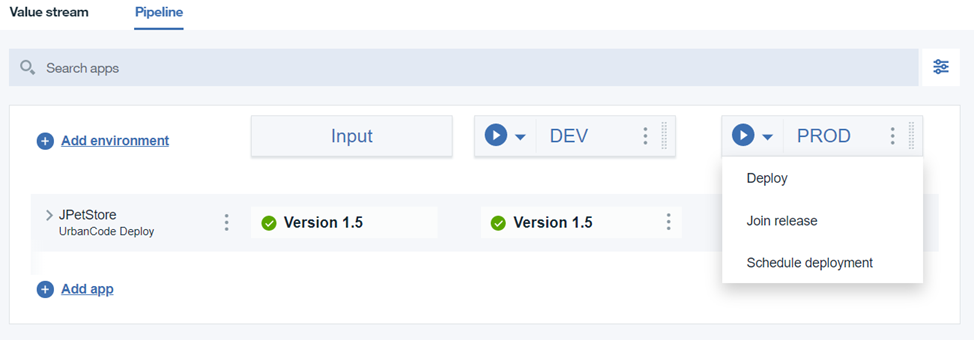
In the Action field, select the check boxes for the required deployment modes from the list of Deploy, Join release, and Schedule deployment.
If more than one deployment mode is selected, both the default deployment mode play control and drop-down
 will be visible on the environment.
The deployment mode play controls are as follows:
 Deploy
 Join release
 Schedule deployment
- Based on the selected deployment modes from the previous step, in the SET AS DEFAULT field, select the radio button for the default deployment mode.
The deployment mode play control that is visible on the environment will be the default.
-
Click Save.
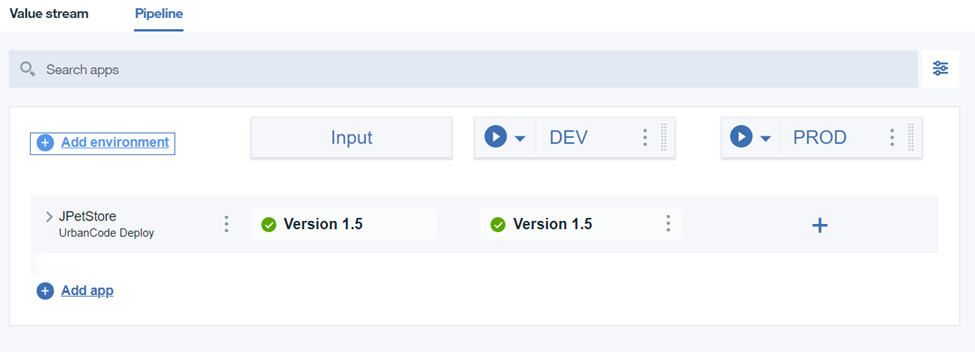
The environment is added to the pipeline as shown in the figure.
-
Move the environment to the required location in the pipeline by hovering the mouse over the right side of the environment until the move cursor
 appears and drag it to the required location in the pipeline.
You can re-order the stages except for the first stage, Input.
-
Click
 and select Edit environment to update the Environment name, deployment modes, and default deployment mode.
-
-
To map an application environment to the stage, complete the following steps:
-
For the environment where you want to add the application, click
 .
. -
On the Map app environment to logical environment window, in the Managed by field, select an environment, and in the Select job field, search and select the required job from the integration.
-
Click Save.
The environment is added to the stage.
-
To view the deployment template associated with the stage, click
 and select View deployment template.
The deployment plan detail page is displayed. As you add apps and jobs to the pipeline, associated tasks are inserted into the plan. You can also add tasks directly to the plan. For example, you might add a DRA task to the top of the plan to ensure deployments can only start after the associated DRA tests are satisfied.
-
To modify the mapped environment, click
 and select Edit application environment.
 -
To delete the environment, click
 and select Delete.
-
-
To add an app, complete the following steps:
-
Click
 to display the Add apps - Choose the apps window.
 -
Click the drop-down list in the Managed by field and select the app.
-
Click Save.
-
-
Click on the deployment mode play control to open the respective modal window.
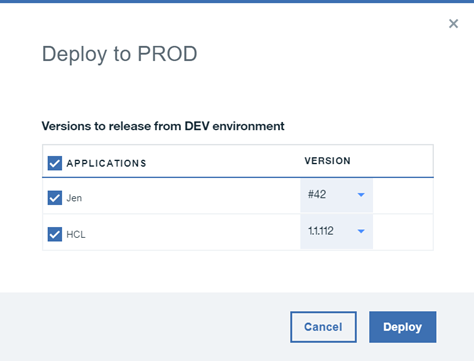
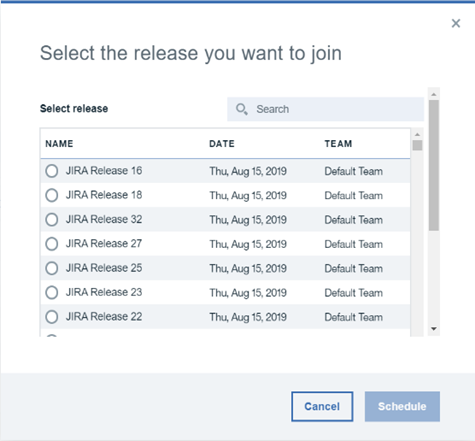
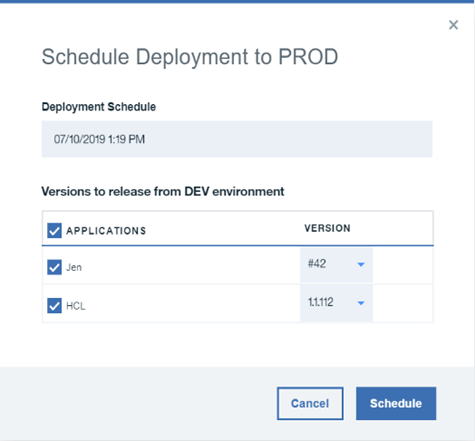
The applications along with the versions deployed or joined releases in the previous environment will be available in the modal window dialogs shown in the figures below. The version to be deployed or joined releases for the selected application can be selected from the drop-down lists shown in the figures below.
-
If Deploy is selected as the default deployment mode, the Deploy modal window is displayed.
-
If Join release is selected as the default deployment mode, the Join release modal window is displayed.
-
If Schedule deployment is selected as the default deployment mode, the Schedule deployment modal window is displayed.
You can also open the respective modal windows by clicking on the
 and selecting either Deploy, Join release, or Schedule deployment.
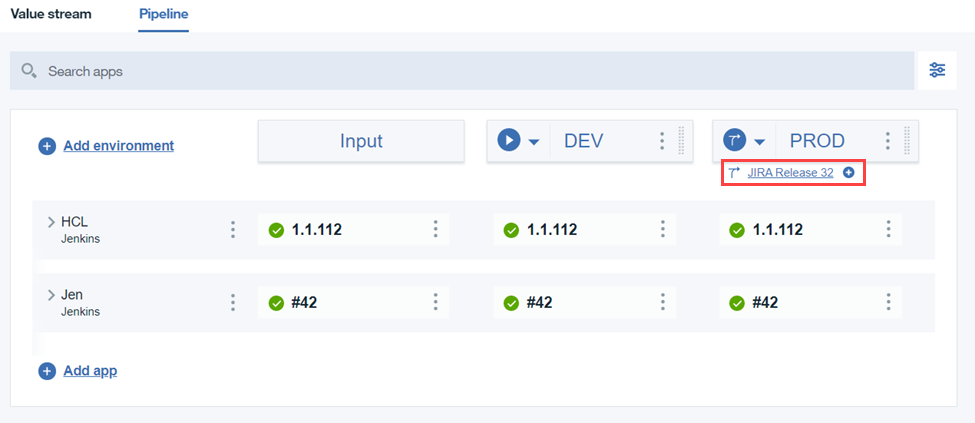
After Join release is scheduled, the join release link appears below the PROD environment including the join release graphic and name. You can click the link to view the deployment plan page.
-
Run a deployment for a pipeline stage.
Parent topic: Pipelines